In today's digital age, communication has evolved beyond just text. With the increasing popularity of voice messages in platforms like Discord, there's a growing need for chat bots that can transcribe these audio messages into text and even generate intelligent responses. In this tutorial, we'll guide you through the process of creating a Discord chat bot that handles voice messages, transcribes them to text, and utilizes a Large Language Model (LLM) to generate meaningful replies.
To really get our hands dirty, we will self-host everything, including the LLMs, using only consumer hardware.
Here is a summary of our chat application design:
- Discord bot written in Go, based on the discordgo library.
- Audio transcoding from Opus to WAV using ffmpeg.
- WAV audio to text transcription using whisper.cpp running on CPU.
- Chat bot based on the Zephyr-7B model running either on CPU or with GPU acceleration using llama.cpp.
Prerequisites
We will need a system running a recent version of Linux. We are using Ubuntu 22.04 here, but other distributions are fine, as long as we have installed:
- Go
- C/C++ compiler
- git
In terms of hardware requirements, we have 3 options:
- Run the audio transcription and the LLM on the CPU. This just needs sufficient RAM (about 16 GB), but is going to be slow.
- Run the audio transcription on the CPU, and the LLM using GPU acceleration. This setup has a good performance to cost ratio, since the LLM is the bottleneck and should be accelerated, not the audio to text transcription. We will need a graphics card with at least 12 GB of RAM. Currently, the cheapest option offering this amount of video RAM is GeForce RTX 3060 at around $250-300 (but be careful to get the 12 GB version and not the 8 GB one).
- Run both models on the GPU. In theory this would make the system faster, but in practice we found that the overall latency may even increase, depending on the AI model used.
In our setup we use:
- AMD Ryzen 7 3700X 8-Core
- 32 GB of system RAM
- NVIDIA GeForce RTX 3060 12 GB
Such a system can be easily put together with a total cost of around $750-1000.
In addition to the above, we also need a Discord account to create our bot.
Discord bot creation
Creation of the Discord bot is quite simple.
- Make sure you’re logged on to the Discord website.
- Navigate to the application page
- Click on the
New Application
button. - Give the application a name and click
Create
. - Navigate to the
Bot
tab to configure it. - Make sure that Public Bot is ticked if you want others to invite your bot.
- Require OAuth2 Code Grant should be unchecked, since we are not using it.
- Copy the token using the
Copy
button. If you don't see a token, regenerate it.
Note that the bot token is essentially your bot’s password, so you must never share it with anyone else. Otherwise, someone else can log in to your bot and do malicious things, such as spam people or worse, which could lead to you getting banned from Discord.
Discord bot backend code
Now we are going to write our bot code. We will use Go and the discordgo library.
We download the discordgo source code and base our bot on one of the included example programs:
git clone https://github.com/bwmarrin/discordgo.git
cd discordgo/examples/pingpong
The pingpong bot only replies to channel messages. Let's modify the bot to handle only direct messages. Open main.go and change the session initialization to set intents as:
session.Identify.Intents = discordgo.IntentsDirectMessages
We build the bot and run it, passing our secret token on the command line:
go build
./pingpong -t YOUR_BOT_TOKEN
Bot is now running.  Press CTRL-C to exit.
Now open a direct message window with the bot from the Discord app, using the bot's name and #number from the discord developer page.
If we send the message ping
, the bot should reply with pong
.
Voice messages: download audio attachment
First, let's take a look at how the pingpong bot handles messages. The message handler code is very simple:
func messageCreate(s *discordgo.Session, m *discordgo.MessageCreate) {
    // Ignore all messages created by the bot itself
    // This isn't required in this specific example but it's a good practice.
    if m.Author.ID == s.State.User.ID {
        return
    }
    // If the message is "ping" reply with "Pong!"
    if m.Content == "ping" {
        s.ChannelMessageSend(m.ChannelID, "Pong!")
    }
    // If the message is "pong" reply with "Ping!"
    if m.Content == "pong" {
        s.ChannelMessageSend(m.ChannelID, "Ping!")
    }
}
The code reads the message text from m.Content and replies based on its predefined logic.
Instead, we want to be able to handle both text and voice messages.
The Discord documentation helpfully describes how voice messages are structured:
Voice messages are messages with the IS_VOICE_MESSAGE flag. They have the following properties:
- They cannot be edited.
- Only a single audio attachment is allowed. No content, stickers, etc.
- The attachment has additional fields: duration_secs and waveform.
- The waveform is intended to be a preview of the entire voice message, with 1 byte per datapoint encoded in base64. Clients sample the recording at most once per 100 milliseconds, but will downsample so that no more than 256 datapoints are in the waveform.
- Clients upload a 1 channel, 48000 Hz, 32kbps Opus stream in an OGG container. The encoding, and the waveform details, are an implementation detail and may change without warning or documentation.
In short, voice messages are messages with no text, that have a single OGG audio file as attachment. That's great! For now, let's just download the attachment to a file when we get such a message. We will handle the file later.
func messageHandleVoice(m *discordgo.MessageCreate) error {
    if strings.TrimSpace(m.Content) != "" {
        return fmt.Errorf("text message")
    }
    if len(m.Message.Attachments) != 1 {
        return fmt.Errorf("not a single attachment")
    }
    att := m.Message.Attachments[0]
    fmt.Printf("%s %s\n", att.URL, att.ContentType)
    if !strings.HasPrefix(att.ContentType, "audio/") {
        return fmt.Errorf("not audio attachment")
    }
    path := fmt.Sprintf("/tmp/%s", m.ID)
    err := downloadFile(path1, att.URL)
    if err != nil {
        return err
    }
    return nil
}

func messageCreate(s *discordgo.Session, m *discordgo.MessageCreate) {
    // Ignore all messages created by the bot itself
    if m.Author.ID == s.State.User.ID {
        return
    }

    if messageHandleVoice(m) == nil {
        s.ChannelMessageSend(m.ChannelID, "thank you for the voice message :)")
    }
    ...
}
And the downloadFile helper is just a simple HTTP download function using the Go standard library:
func downloadFile(filepath string, url string) (err error) {
    // Create the file
    out, err := os.Create(filepath)
    if err != nil {
        return err
    }
    defer out.Close()

    // Get the data
    resp, err := http.Get(url)
    if err != nil {
        return err
    }
    defer resp.Body.Close()

    // Check server response
    if resp.StatusCode != http.StatusOK {
        return fmt.Errorf("bad status: %s", resp.Status)
    }

    // Writer the body to file
    _, err = io.Copy(out, resp.Body)
    if err != nil {
        return err
    }

    fmt.Printf("Downloaded: %q %q\n", url, filepath)
    return nil
}
If we now send a voice message to our bot from the Discord app, it should save it to an OGG file in /tmp.
Converting the audio file to WAV
Since for audio to text transcription we use whisper, we must provide the audio file in the format it requires. Whisper helpfully specifies in the readme that it supports only 16-bit WAV files encoded at 16 kHz.
We use ffmpeg to transcode the file from OGG to WAV:
ffmpeg -i /tmp/sample -acodec pcm_s16le -ac 1 -ar 16000 -y /tmp/sample.wav
Now let's adapt our Go code to call the ffmpeg command:
func messageHandleVoice(m *discordgo.MessageCreate) error {
    if strings.TrimSpace(m.Content) != "" {
        return fmt.Errorf("text message")
    }
    if len(m.Message.Attachments) != 1 {
        return fmt.Errorf("not a single attachment")
    }
    att := m.Message.Attachments[0]
    fmt.Printf("%s %s\n", att.URL, att.ContentType)
    if !strings.HasPrefix(att.ContentType, "audio/") {
        return fmt.Errorf("not audio attachment")
    }
    path1 := fmt.Sprintf("/tmp/%s", m.ID)
    path2 := path1 + ".wav"
    err := downloadFile(path1, att.URL)
    if err != nil {
        return err
    }
    args := []string{"-i", path1, "-acodec", "pcm_s16le", "-ac", "1", "-ar", "16000", "-y", path2}
    cmd := exec.Command("ffmpeg", args...)
    err = cmd.Run()
    if err != nil {
        return err
    }
    fmt.Printf("Converted: %q %q\n", path1, path2)
    return nil
}
Transcribing the audio WAV file to text
Now that we are done with the Discord boilerplate, the fun starts. We will use whisper to transcribe the audio to text, which implements our first AI model.
First, let's get the whisper source code:
git clone https://github.com/ggerganov/whisper.cpp
cd whisper
If we use CPU-only transcription, we just compile it with:
make
If we want to also use GPU acceleration, and we have an Nvidia card with sufficient memory, we compile it with:
make clean
WHISPER_CUBLAS=1 make -j
However, to transcribe audio to text, a CPU-only implementation is usually sufficient, since the latency is of only a few seconds.
An extra step is required to download the AI model. We will use the small
model for English:
bash ./models/download-ggml-model.sh small.en
Let's run a quick test. We will decode one of the whisper sample audio files with the application we have just compiled:
./main -t 8 -nt -m models/ggml-small.en.bin -f samples/jfk.wav
whisper_init_from_file_no_state: loading model from 'models/ggml-small.en.bin'
whisper_model_load: loading model
whisper_model_load: n_vocab       = 51864
whisper_model_load: n_audio_ctx   = 1500
whisper_model_load: n_audio_state = 768
whisper_model_load: n_audio_head  = 12
whisper_model_load: n_audio_layer = 12
whisper_model_load: n_text_ctx    = 448
whisper_model_load: n_text_state  = 768
whisper_model_load: n_text_head   = 12
whisper_model_load: n_text_layer  = 12
whisper_model_load: n_mels        = 80
whisper_model_load: ftype         = 1
whisper_model_load: qntvr         = 0
whisper_model_load: type          = 3
whisper_model_load: adding 1607 extra tokens
whisper_model_load: model ctx     =  464.68 MB
whisper_model_load: model size    =  464.44 MB
whisper_init_state: kv self size  =   15.75 MB
whisper_init_state: kv cross size =   52.73 MB
whisper_init_state: compute buffer (conv)   =   19.96 MB
whisper_init_state: compute buffer (encode) =  122.04 MB
whisper_init_state: compute buffer (cross)  =    5.86 MB
whisper_init_state: compute buffer (decode) =   36.17 MB

system_info: n_threads = 8 / 16 | AVX = 1 | AVX2 = 1 | AVX512 = 0 | FMA = 1 | NEON = 0 | ARM_FMA = 0 | METAL = 0 | F16C = 1 | FP16_VA = 0 | WASM_SIMD = 0 | BLAS = 0 | SSE3 = 1 | SSSE3 = 1 | VSX = 0 | COREML = 0 | OPENVINO = 0 |

main: processing 'samples/jfk.wav' (176000 samples, 11.0 sec), 8 threads, 1 processors, lang = en, task = transcribe, timestamps = 0 ...


 And so, my fellow Americans, ask not what your country can do for you. Ask what you can do for your country.

whisper_print_timings:     load time =   197.09 ms
whisper_print_timings:     fallbacks =   0 p /   0 h
whisper_print_timings:      mel time =    10.94 ms
whisper_print_timings:   sample time =    10.52 ms /    30 runs (    0.35 ms per run)
whisper_print_timings:   encode time =  2369.13 ms /     1 runs ( 2369.13 ms per run)
whisper_print_timings:   decode time =   294.89 ms /    30 runs (    9.83 ms per run)
whisper_print_timings:   prompt time =     0.00 ms /     1 runs (    0.00 ms per run)
whisper_print_timings:    total time =  2936.64 ms
It worked! And it transcribed the audio in under 3 seconds, which is quite good for a full sentence of 11 seconds.
To explain the parameters: * -t 8: use 8 threads, since we have a CPU with 8 cores * -nt: do not add timestamps to the text * -m models/ggml-small.en.bin: the model file to use * -f samples/jfk.wav: the audio input file to transcribe
If we want to make transcription slightly faster, we can use quantization, which basically reduces the floating point operation precision, sacrificing some quality for speed. We can generate a quantized model from the original model with:
make quantize
./quantize models/ggml-small.en.bin models/ggml-small.en.q8_0.bin q8_0
We run the transcription with the quantized model:
./main -t 16 -nt -m models/ggml-small.en.q8_0.bin -f samples/jfk.wav
whisper_init_from_file_no_state: loading model from 'models/ggml-small.en.q8_0.bin'
whisper_model_load: loading model
whisper_model_load: n_vocab       = 51864
whisper_model_load: n_audio_ctx   = 1500
whisper_model_load: n_audio_state = 768
whisper_model_load: n_audio_head  = 12
whisper_model_load: n_audio_layer = 12
whisper_model_load: n_text_ctx    = 448
whisper_model_load: n_text_state  = 768
whisper_model_load: n_text_head   = 12
whisper_model_load: n_text_layer  = 12
whisper_model_load: n_mels        = 80
whisper_model_load: ftype         = 7
whisper_model_load: qntvr         = 2
whisper_model_load: type          = 3
whisper_model_load: adding 1607 extra tokens
whisper_model_load: model ctx     =  251.88 MB
whisper_model_load: model size    =  251.64 MB
whisper_init_state: kv self size  =   15.75 MB
whisper_init_state: kv cross size =   52.73 MB
whisper_init_state: compute buffer (conv)   =   19.96 MB
whisper_init_state: compute buffer (encode) =  122.04 MB
whisper_init_state: compute buffer (cross)  =    5.86 MB
whisper_init_state: compute buffer (decode) =   36.17 MB

system_info: n_threads = 16 / 16 | AVX = 1 | AVX2 = 1 | AVX512 = 0 | FMA = 1 | NEON = 0 | ARM_FMA = 0 | METAL = 0 | F16C = 1 | FP16_VA = 0 | WASM_SIMD = 0 | BLAS = 0 | SSE3 = 1 | SSSE3 = 1 | VSX = 0 | COREML = 0 | OPENVINO = 0 |

main: processing 'samples/jfk.wav' (176000 samples, 11.0 sec), 16 threads, 1 processors, lang = en, task = transcribe, timestamps = 0 ...


 And so, my fellow Americans, ask not what your country can do for you. Ask what you can do for your country.

whisper_print_timings:     load time =   125.99 ms
whisper_print_timings:     fallbacks =   0 p /   0 h
whisper_print_timings:      mel time =    11.96 ms
whisper_print_timings:   sample time =    10.49 ms /    30 runs (    0.35 ms per run)
whisper_print_timings:   encode time =  1592.59 ms /     1 runs ( 1592.59 ms per run)
whisper_print_timings:   decode time =   212.60 ms /    30 runs (    7.09 ms per run)
whisper_print_timings:   prompt time =     0.00 ms /     1 runs (    0.00 ms per run)
whisper_print_timings:    total time =  2004.09 ms
That's really nice! We reduced the audio decoding latency by 30%, from 3 seconds down to 2 seconds. This is good enough, and will do just fine for our chat application.
Let's benchmark the transcription performance, so that you would know more or less what to expect depending on the hardware you have:
| Hardware | Original model | 8-bit quantized model |
|---|---|---|
| CPU 1 core | 16.6 seconds | 11.6 seconds |
| CPU 2 cores | 8.7 seconds | 6.2 seconds |
| CPU 4 cores | 4.9 seconds | 3.5 seconds |
| CPU 8 cores | 2.9 seconds | 2.0 seconds (best) |
| RTX 3060 | 4.0 seconds | 3.8 seconds |
| RTX 4090 | 3.2 seconds | 2.9 seconds |
Note that when using a GPU for audio transcription, it does not make sense to pass more than 1 thread as a parameter to main. In fact, passing more than 1 may cause it to hang.
Also, the model loading time on the GPU introduces additional latency of about 0.8 seconds. In a production app, this would be avoided by making the program resident in memory and operating as a service that handles multiple
audio transcription requests. Still, this would make the GPU accelerated solution just as good as 8-core CPU transcription. Unless one wants to use the medium
or large
high-quality models, it does not make sense
to run the transcription on the GPU.
Integrate audio transcription with the Discord bot
Now that we have a program we can use to do audio transcription, we just have to call it from our Discord bot:
func messageHandleVoice(m *discordgo.MessageCreate) error {
if strings.TrimSpace(m.Content) != "" {
return fmt.Errorf("text message")
}
if len(m.Message.Attachments) != 1 {
return fmt.Errorf("not a single attachment")
}
att := m.Message.Attachments[0]
fmt.Printf("%s %s\n", att.URL, att.ContentType)
if !strings.HasPrefix(att.ContentType, "audio/") {
return fmt.Errorf("not audio attachment")
}
path1 := fmt.Sprintf("/tmp/%s", m.ID)
path2 := path1 + ".wav"
err := downloadFile(path1, att.URL)
if err != nil {
return err
}
args := []string{"-i", path1, "-acodec", "pcm_s16le", "-ac", "1", "-ar", "16000", "-y", path2}
cmd := exec.Command("ffmpeg", args...)
err = cmd.Run()
if err != nil {
return err
}
fmt.Printf("Converted: %q %q\n", path1, path2)
args = []string{"-t", "16", "-nt", "-m", "/home/ubuntu/whisper.cpp/models/ggml-small.en.q8_0.bin", "-f", path2}
cmd = exec.Command("/home/ubuntu/whisper.cpp/main", args...)
var out strings.Builder
cmd.Stdout = &out
err = cmd.Run()
if err != nil {
return err
}
text := strings.TrimSpace(out.String())
fmt.Printf("Transcribed: %q\n", text)
if text != "" {
// Just write the text into m.Content, so the rest of the code
// behaves as if we got a text message :)
m.Content = text
return nil
}
return fmt.Errorf("no text in audio message")
}
func messageCreate(s *discordgo.Session, m *discordgo.MessageCreate) {
// Ignore all messages created by the bot itself
if m.Author.ID == s.State.User.ID {
return
}
if messageHandleVoice(m) == nil {
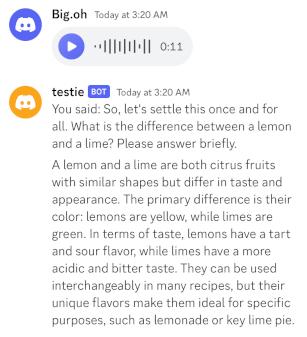
s.ChannelMessageSend(m.ChannelID, fmt.Sprintf("You said: %s", m.Content))
}
...
}
The audio handling code transcribes the voice message to text, and stores it
into m.Content, so the rest of the code can work as if a text message has
been received.
Note that the bot also helpfully replies with You said: <audio transcription>
before further handling, to ensure that the user has some feedback that the
voice message has been understood correctly.
Run the Zephyr 7B LLM locally
To run the LLM, we will use the Zephyr-7B model running on llama.cpp. llama.cpp is an implementation that requires only CPU, but also supports GPU acceleration.
First, let's download the llama.cpp source code:
git clone https://github.com/ggerganov/llama.cpp
cd llama.cpp
If we want to use just CPU, we compile it with:
mkdir build
cd build
cmake ..
make -j
If we want to use GPU acceleration, we compile it with:
mkdir build
cd build
cmake .. -DLLAMA_CUBLAS=ON
make -j
Once we have llama.cpp built, we need to download the LLM model. We will use Zephyr 7B with Q5_K_M quantization, which fits just under the memory limit of an Nvidia RTX 3060 card with 12 GB of RAM:
cd ../models
wget https://huggingface.co/TheBloke/zephyr-7B-alpha-GGUF/resolve/main/zephyr-7b-alpha.Q5_K_M.gguf
Zephyr is a recent (as of October 2023) model with excellent performance, even with only 7 billion parameters. What is really nice about it is that it has 32k token context window, which makes it great for implementing a chat bot able to remember and refer to previous messages exchanged in the conversation.
We run llama.cpp in server mode, using GPU acceleration:
~/llama.cpp/build/bin/server -c 32768 --n-gpu-layers 999 -t 8 --host 0.0.0.0 --port 5000 -m ~/llama.cpp/models/zephyr-7b-alpha.Q5_K_M.gguf
To run it on the CPU, simple remove the --n-gpu-layers 999 argument.
We do a quick test sending a POST request with curl:
curl -H "Content-Type: application/json" -X POST -d '{"prompt":"What is the difference between a lemon and a lime?"}' http://127.0.0.1:5000/completion

{"content":"\n\nLemon and Lime are two citrus fruits that are very similar in taste but have some differences. Both lemons and limes are commonly used in cooking, baking, and making drinks. They are often interchangeable in recipes, but some differences in flavor and texture make them better suited for certain dishes than others.\n\nHere are the main differences between lemon and lime:\n\n1. Appearance: Lemon has a bright yellow color, whereas Lime is greenish-yellow or even dark green when unripe. Lemons are also larger in size compared to limes.\n\n2. Flavor: Both lemons and limes have a tart taste, but lemon tends to be more acidic and bitter. This makes it better suited for dishes with a strong flavor like chicken, fish, or soups. Lime, on the other hand, is sweeter and less acidic than lemon, giving it a more refreshing taste that pairs well in drinks, desserts, and seafood dishes.\n\n3. Juice: Lemon has a higher water content compared to lime, which means their juice will be thinner. The juice of lemons can also contain seeds, while the juice of limes is usually seedless.\n\n4. Thickness of Skin: Lemons have thicker skin than limes, making them harder to peel and zest. Limes have a smoother skin that is easier to peel or zest.\n\n5. Aroma: Both lemons and limes have a strong citrus scent, but lemon has a more floral aroma, while lime has a fresh, green scent.\n\nIn summary, while both lemons and limes are used interchangeably in many dishes, their differences in flavor, texture, and appearance make them better suited for specific recipes. Lemon's tartness is ideal for savory dishes, while lime's sweetness complements desserts and seafood.","generation_settings":{"frequency_penalty":0.0,"grammar":"","ignore_eos":false,"logit_bias":[],"mirostat":0,"mirostat_eta":0.10000000149011612,"mirostat_tau":5.0,"model":"/home/ubuntu/llama.cpp/models/zephyr-7b-alpha.Q5_K_M.gguf","n_ctx":32768,"n_keep":0,"n_predict":-1,"n_probs":0,"penalize_nl":true,"presence_penalty":0.0,"repeat_last_n":64,"repeat_penalty":1.100000023841858,"seed":4294967295,"stop":[],"stream":false,"temp":0.800000011920929,"tfs_z":1.0,"top_k":40,"top_p":0.949999988079071,"typical_p":1.0},"model":"/home/ubuntu/llama.cpp/models/zephyr-7b-alpha.Q5_K_M.gguf","prompt":"What is the difference between lemon and lime?","stop":true,"stopped_eos":true,"stopped_limit":false,"stopped_word":false,"stopping_word":"","timings":{"predicted_ms":8701.315,"predicted_n":418,"predicted_per_second":48.03871598718125,"predicted_per_token_ms":20.816543062200957,"prompt_ms":124.307,"prompt_n":11,"prompt_per_second":88.49059184116744,"prompt_per_token_ms":11.300636363636364},"tokens_cached":429,"tokens_evaluated":11,"tokens_predicted":418,"truncated":false}
Integrate the LLM with the Discord bot
Now that we have the LLM, we do a simple integration with our Discord bot.
To start, we will just have the LLM reply to the user message, without any context.
func messageCreate(s *discordgo.Session, m *discordgo.MessageCreate) {
    // Ignore all messages created by the bot itself
    if m.Author.ID == s.State.User.ID {
        return
    }

    if messageHandleVoice(m) == nil {
        s.ChannelMessageSend(m.ChannelID, fmt.Sprintf("You said: %s", m.Content))
    }

    prompt := fmt.Sprintf(`<|system|>You are a helpful digital assistant. Provide an answer to the user. Be direct, avoid recommending reaching out to other professionals, and ask clarification questions if needed. Don't write too much, keep messages at around one paragraph maximum.
</s>
<|user|>
%s</s>
<|assistant|>`, m.Content)
    stop := "</s> <|>"

    // Call the LLM
    reply := runai(prompt, stop)
    if reply == "" {
        s.ChannelMessageSend(m.ChannelID, "Failed to process message")
        return
    }
    // Discord does not allow sending messages over 2000 characters in size.
    if len(reply) > 1900 {
        reply = reply[:1900] + " (truncated)"
    }
    sent, err := s.ChannelMessageSend(m.ChannelID, reply)
    if err != nil {
        fmt.Println("error sending DM message:", err)
        return
    }
}
Note that we generate a prompt that contains the user query, and we use a specific template based on the one that was used to train the Zephyr model. Using the right format is very important to get good results. Typically, it can be found in the model card on HuggingFace.
The runai function sends an HTTP POST request to the llama.cpp server that is
running locally:
func runai(prompt string, stop string) string {
    reply := ""
    // We need multiple tries, since sometimes the model generates directly a stop token, thus an empty message.
    for try := 0; try < 5; try++ {
        // Prepare POST request payload
        sendData := make(map[string]interface{})
        sendData["stop"] = strings.Split(stop, " ")
        sendData["prompt"] = prompt
        // Marshal payload as JSON
        buf, err := json.Marshal(sendData)
        if err != nil {
            fmt.Println("error in marshal:", err)
            return ""
        }
        // Send POST request to local llama.cpp server
        resp, err := http.Post("http://127.0.0.1:5000/completion", "application/json", bytes.NewBuffer(buf))
        if err != nil {
            fmt.Println("error in chat req:", err)
            return ""
        }
        // Get response payload
        defer resp.Body.Close()
        body, err := io.ReadAll(resp.Body)
        if err != nil {
            fmt.Println("error in chat req:", err)
            return ""
        }
        // Deserialize JSON into map
        var data map[string]interface{}
        err = json.Unmarshal([]byte(body), &data)
        if err != nil {
            fmt.Printf("could not unmarshal json: %s\n", err)
            return ""
        }
        // Dump it onto the terminal for debugging
        fmt.Printf("############## PROMPT START #################\n%v\n############## PROMPT END #################\n", prompt)
        reply = strings.TrimSpace(data["content"].(string))
        fmt.Printf("%s\n############## REPLY END #################\n", reply)
        if reply != "" {
            break
        }
    }
    return reply
}
We make multiple attempts to send the POST request, since sometimes the model returns an empty string as the reply. Maybe this can be avoided by tweaking the request parameters, but was not looked into due to lack of time.
At this point, we can already test the Discord bot with a voice message.
To add the whole conversation as context, we store messages in a map keyed by user ID, and we insert the conversation into the prompt:
var context = make(map[string][]string)

func messageCreate(s *discordgo.Session, m *discordgo.MessageCreate) {
    ...
    user := m.Author.ID
    // Create user context if missing
    if _, ok := context[user]; !ok {
        context[user] = []string{}
    }
    // Add message to the user context
    context[user] = append(context[user], fmt.Sprintf("%s: %s", user, m.Content))
    ...
    // Include the context in the prompt
    prompt = fmt.Sprintf(`<|system|>You are a helpful digital assistant. Below is a conversation between you and a user. Provide an answer to the last message sent by the user. Be direct, avoid recommending reaching out to other professionals, and ask clarification questions if needed. Don't write too much, keep messages at around one paragraph maximum.
%s
</s>
<|user|>
%s</s>
<|assistant|>`, strings.Join(context[:len(context)-1], "\n"), m.Content)
        stop = m.Author.Username + ": # " + s.State.User.Username + ":" + " </s> <|>"
    }
    ...
    sent, err := s.ChannelMessageSend(m.ChannelID, reply)
    if err != nil {
        fmt.Println("error sending DM message:", err)
        return
    }
    // Add our reply to the user context
    context[user] = append(context[user], fmt.Sprintf("%s: %s", user, m.Content))
    ...
}
Comments disabled for this post.